 Chuck Lorenz
On This Page
This one is really simple. All it takes is two clicks.
Watch on YouTube
Watch the video at the end of this article or jump to YouTube now!
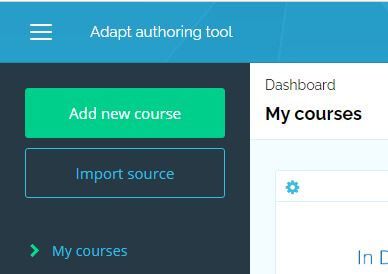
Start in the authoring tool dashboard.
First click: "Add new course" button
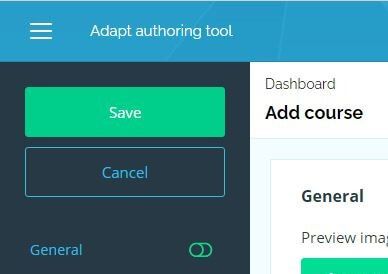
Second click: "Save" button
And with that you have created an Adapt course.
You'll need to click one more button if you want to see it in action. Click the "Preview course" button.
Of course, your new course is practically useless in this state. It contains 20 words—that you didn't write—and no graphics, no media. 🥱😴
But it was EASY! So let's continue to prep it for some of your awesome content.
Basic course configuration
Add preview image
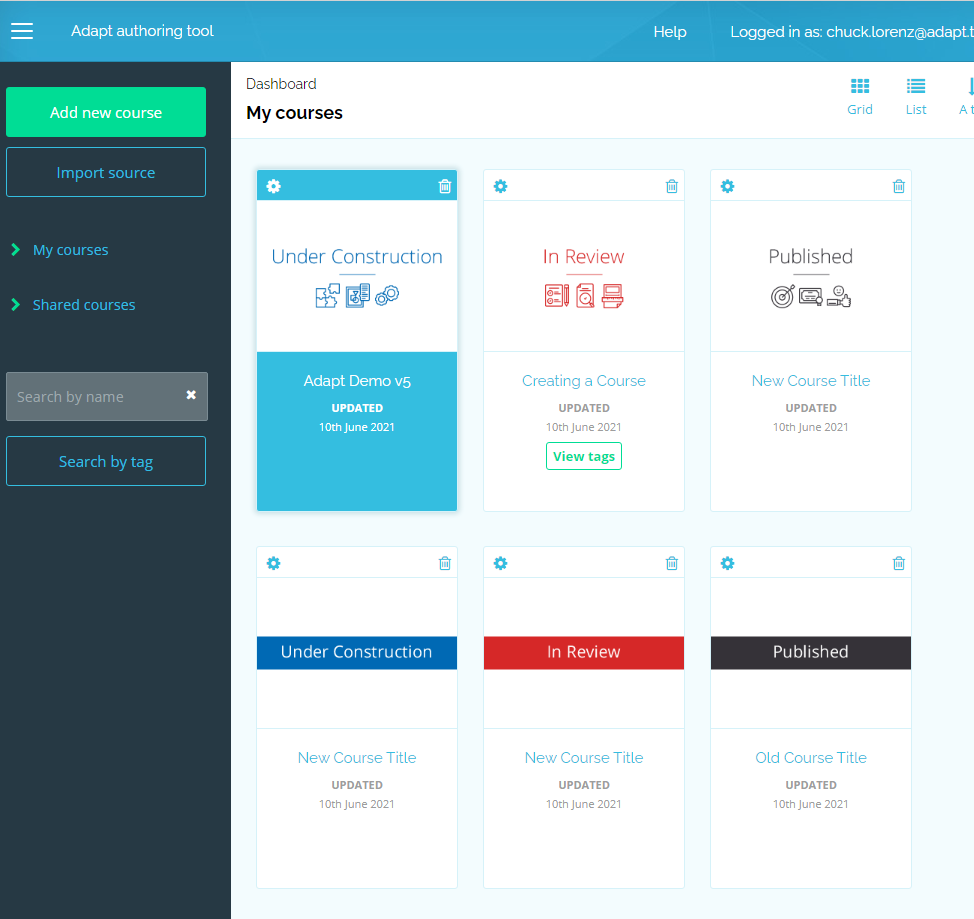
Select an asset that will function as your course's poster or hero image. Since it's only visible within the AT, it can serve an internal function. Perhaps it identifies the client or the course builder. I like to have it indicate the stages of development: "in development," "in review," "published."
Free Resource
Download a collection of course status labels you can use as course preview images.
- 4 styles to choose from
- alternative labels
- In Development, Under Construction, In Progress
- In Review
- Published, Live, In Production
- with white background for immediate use
- with transparent background to overlay your images
Add Title and Display Title
New courses are so easy to make (and so easy to delete) that you'll want to label yours with a proper title. Get something in there now to distinguish it from the test course your colleague is about to delete. The Display Title should be your main concern right now. It's displayed in the dashboard and on the course menu. You may use HTML to format the Display Title.
The Title is transmitted with SCORM data to the LMS and is used as the title element in the head of an HTML page (<html><head><title>). Because of these uses, I recommend against including any HTML within your Title.
Your menu code will determine whether the Subtitle gets displayed. We're focusing on basic configuration, so let's skip Subtitle, Description, Body, Instruction text, and HTML Classes—unless you have them at-hand.
Add tags
The AT offers you tags to help you organize. Organize early when you have little, and later it will benefit you when you have accumulated much. Your team can decide how to use these tags. Categorize courses by client, author, department, year—whatever is helpful for you, your leaders, or your admins. If nothing else, consider using the course tag to identify the course owner or builder. When a course is shared with all users, it can be helpful to know who is responsible for which courses.
Should you "Share with all users" now? When you share a course in the AT, you give that person the ability to edit the course. I'm an advocate of granting access on a need-to-know basis. It's a principle that helps to prevent needless accidents. But transparency and collaboration are important values, too. So this call belongs to you or to team policy.
Ignore the rest of the options in "Project settings." Click the Save button!
Add useful extensions
Extensions are a category of Adapt plugin that extends core functionality. Some extensions are commonly used, so this is as good a time as any to enable those that are likely to be used. Enabling the following Adapt core extensions is a safe bet: Bookmarking, Page Level Progress, Spoor, and Tutor.
Deploying an extension is a three-step process.
First, install the extension in the authoring tool.
The extension needs to be installed only once. All Adapt core plugins are bundled with the authoring tool. So we can skip this step.
Second, add the extension to your course.
When you navigate to the "Manage extensions" page is divided into two sections: "Enabled extensions" and "Available extensions." Any extension you want to use in the course needs to appear in the "Enable extensions" section. Click the green Add button next to any available extension in order to enable it and to move it to the upper section. By the way, the red Remove button simply removes the extension from the course; it does not delete the plugin from the authoring tool.
Third, configure the extension.
Return from the "Manage extensions" page by clicking the link in the left sidebar, "< Back to course structure." Then choose "> Project settings". In the section labeled "Extensions", you'll find those you have added to your course. Click on each in turn and verify or modify their settings. Don't forget...
Click the Save button!
Conclusion
Creating a course in the Adapt authoring tool is super easy as we've seen. Next step is to add content. Look for other posts in the Step-by-Step series to guide you in these tasks.