 Simon Date

On This Page
Experience API (xAPI) has been a talking point within the e-learning industry for the better part of a decade, presenting the possibility of deep tracking of learner's activities, which, if used correctly, could allow organisation to make data led decisions regarding the design of their learning content.
However, up until recently, xAPI hasn't really been feasible for most learning and development departments to adopt. SCORM has been the go-to standard, due to its widespread support across both platforms and authoring tools. Despite the fact SCORM was created in the late 90s, when even modest data transfer were more of a technical limitation, it has long been considered by many organisations as "good enough" to deal with their compliance tracking needs.
But, over the last couple of years it has felt like we are getting towards a tipping point, where xAPI could soon be the new dominant standard. Today, even a modest sized organisation with an out-of-the-box Learning Management System (LMS) can have access to a built-in Learning Record Store (LRS), which can track xAPI statements generated by learners. Most of these platforms either offer basic analytical tools which can be used to dissect the data collected from this new standard or the ability to export data to a more power tool like Power BI.
On the learning content side, all the mainstream authoring tools have supported xAPI for several years now too. Most automatically handle the naming of tracking variables to send to the LRS. The latest xAPI version - 2.0, which was defined in 2021 and had its release in June of this year, is seeking to make further improvements to the standard. cmi5, an xAPI profile focused on reporting is also another effort to bring the benefits of SCORM (widespread interoperability) to xAPI.
xAPI was designed to allow the LRS to be independent of the platform that the content is actually being consumed on. The benefit of this is that it means that you can track learners experiences across a multitude of learning platforms. The downside is that it means that we have to define our target LRS, something we don't have to do with SCORM, which handles this communication automatically since it only interacts the platform where the content is hosted.
I am now going to show you how you can send your very first xAPI statements using Adapt and SCORM Cloud.
Step 1 - Setting up the LRS
For this demo, we'll be using SCORM Cloud, a popular cloud solution for testing SCORM and xAPI content.
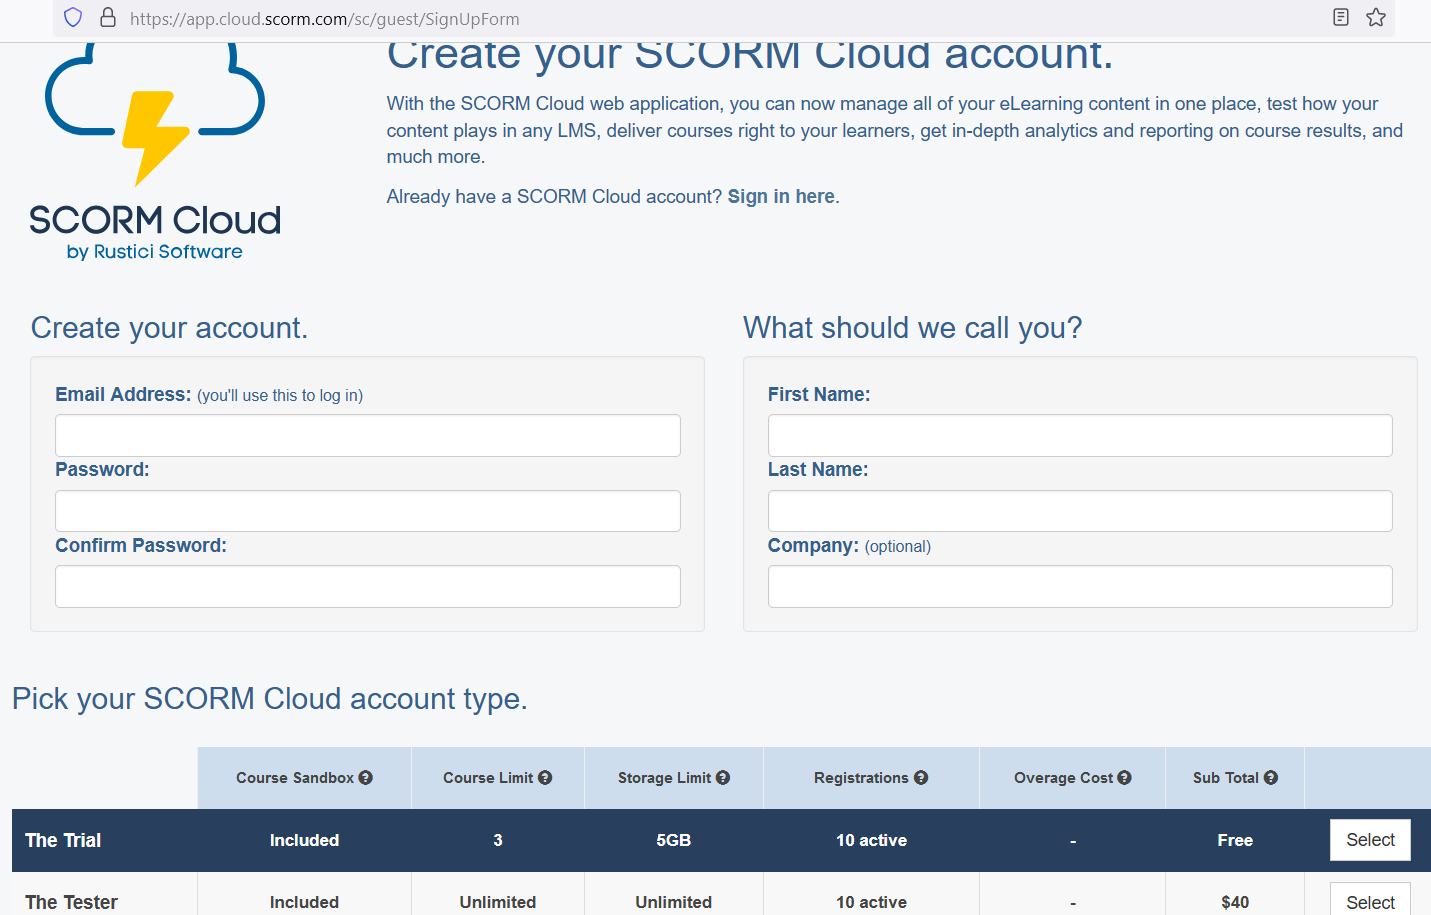
To start you'll need to sign up for their service. Go to this link to create your free account, fill in your details and choose The Trial.
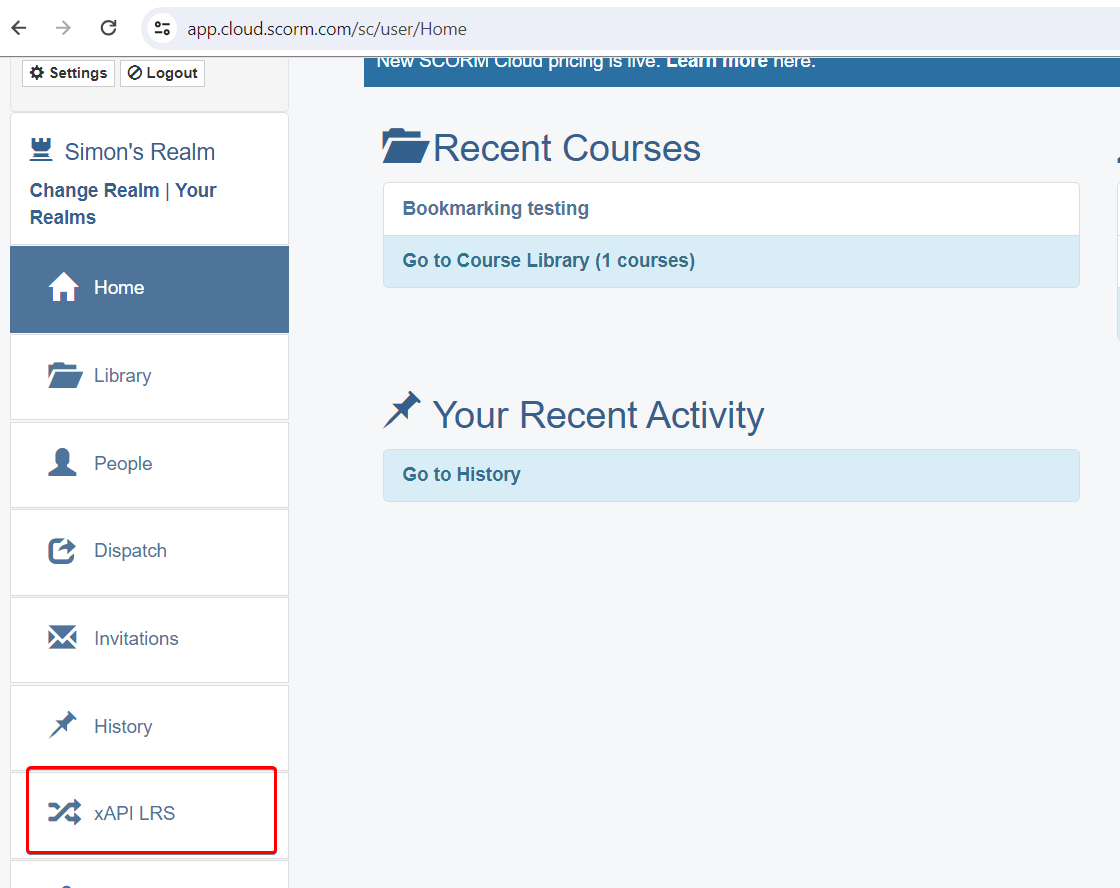
Once logged in, you'll appear at the dashboard. Select xAPI LRS from the menu.
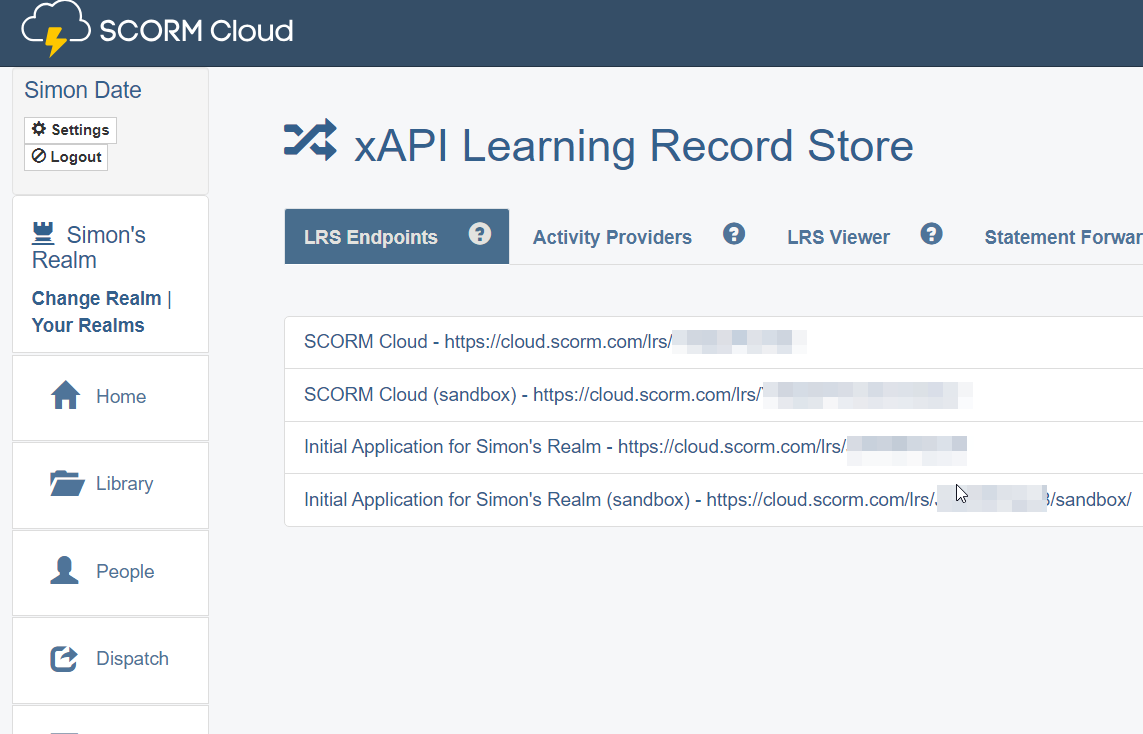
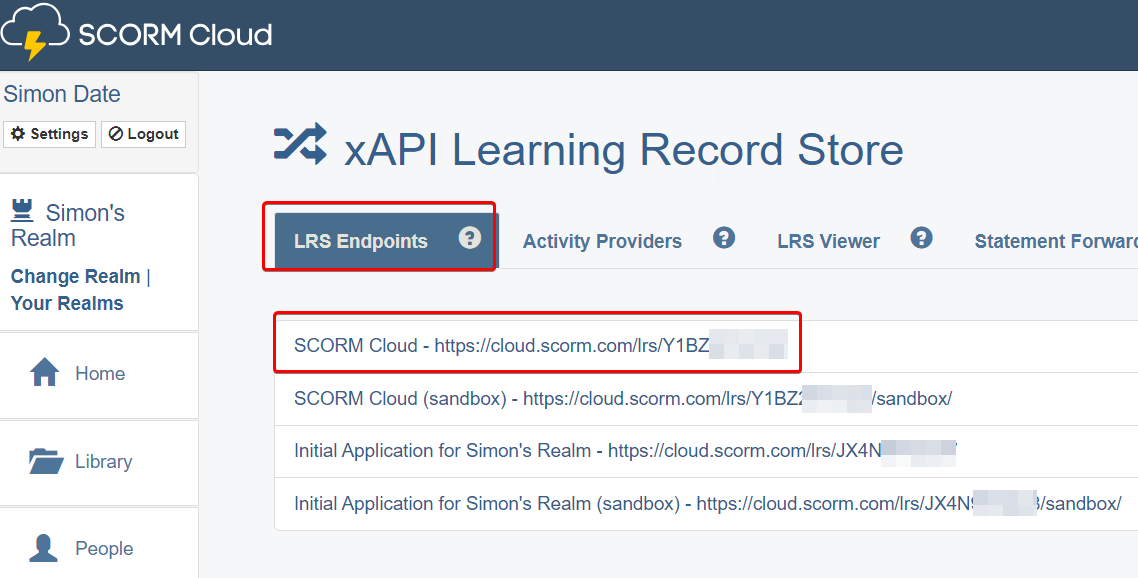
You'll appear on a page with four tabs - LRS Endpoints, Activity Providers, LRS Viewer and Statement Forwarding.
We now have our LRS in place. So let's go back to Adapt and start setting the values that will form the connection between the two platforms.
Step 2 - Install the xAPI extension to your Adapt Authoring Tool
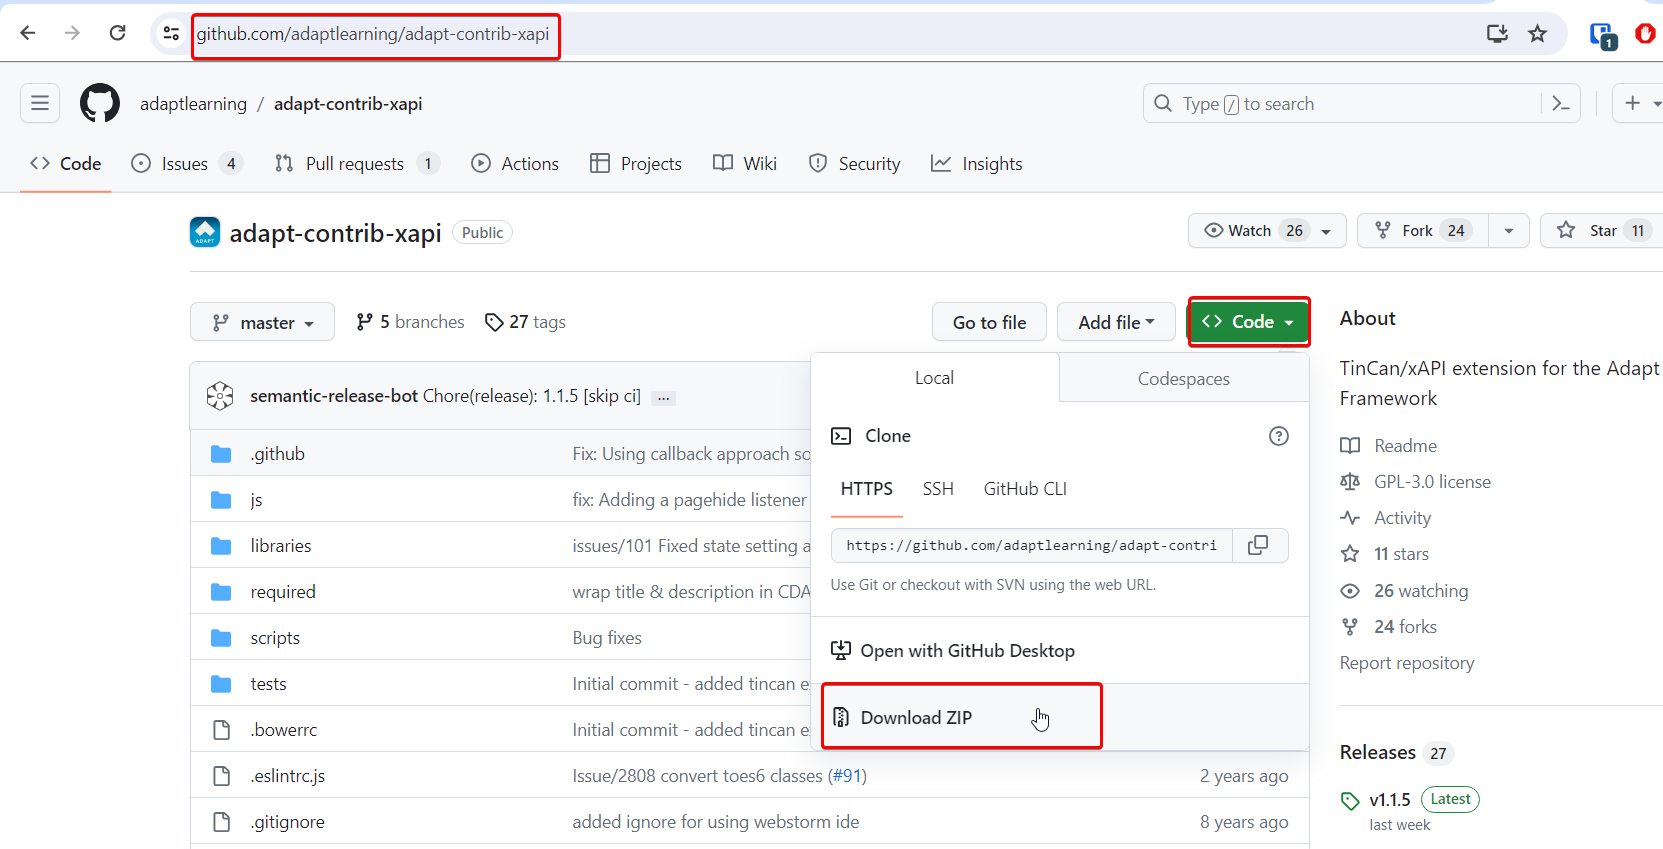
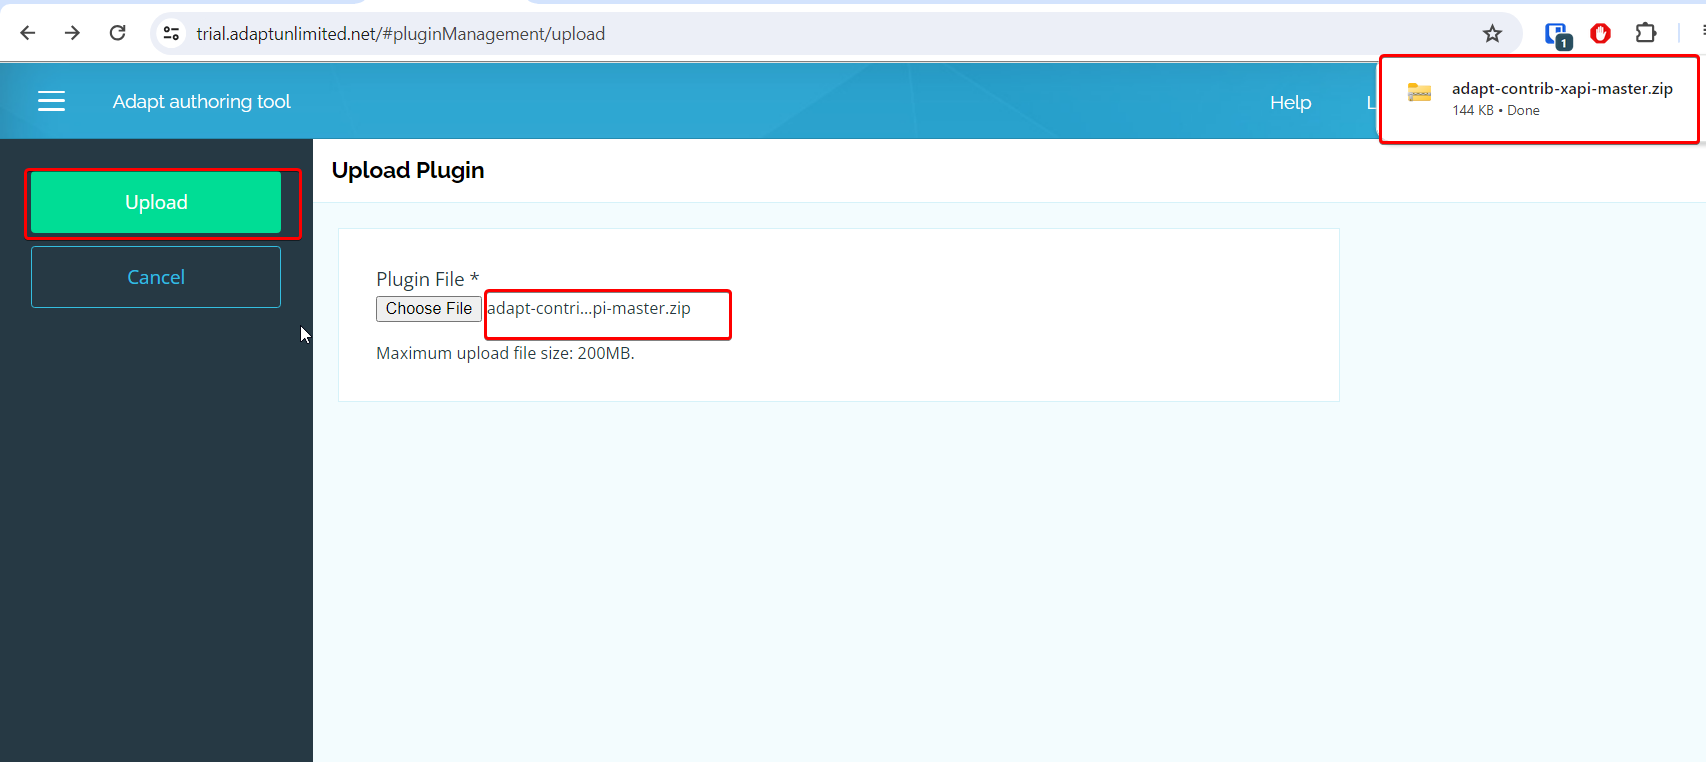
Start by downloading the plugin to your computer. Go to the xAPI Github repository and press the green Code button. This will present options for how to access the code. Just select Download ZIP, which will begin downloading the extension files to your computer.
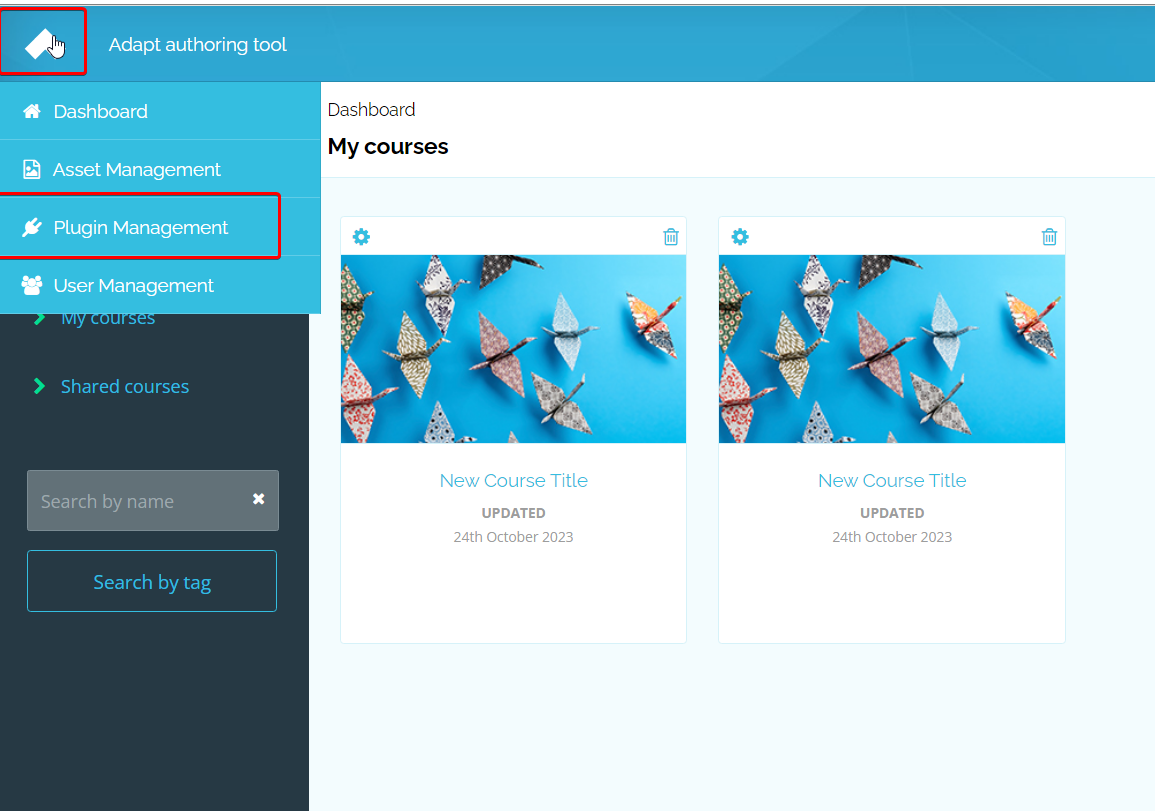
Next you'll need to install these files to your Authoring Tool. To do this, press the Menu button in the top left and navigate to Plugin Management.
Select Upload Plugin to go to the upload plugin page. Choose the xAPI .ZIP file that you just downloaded from Github and then press the Upload button
Step 3 - Setting up your course
Firstly make sure that you have some content that you can test. Add a few basic components to a course or duplicate an existing course for testing purposes.
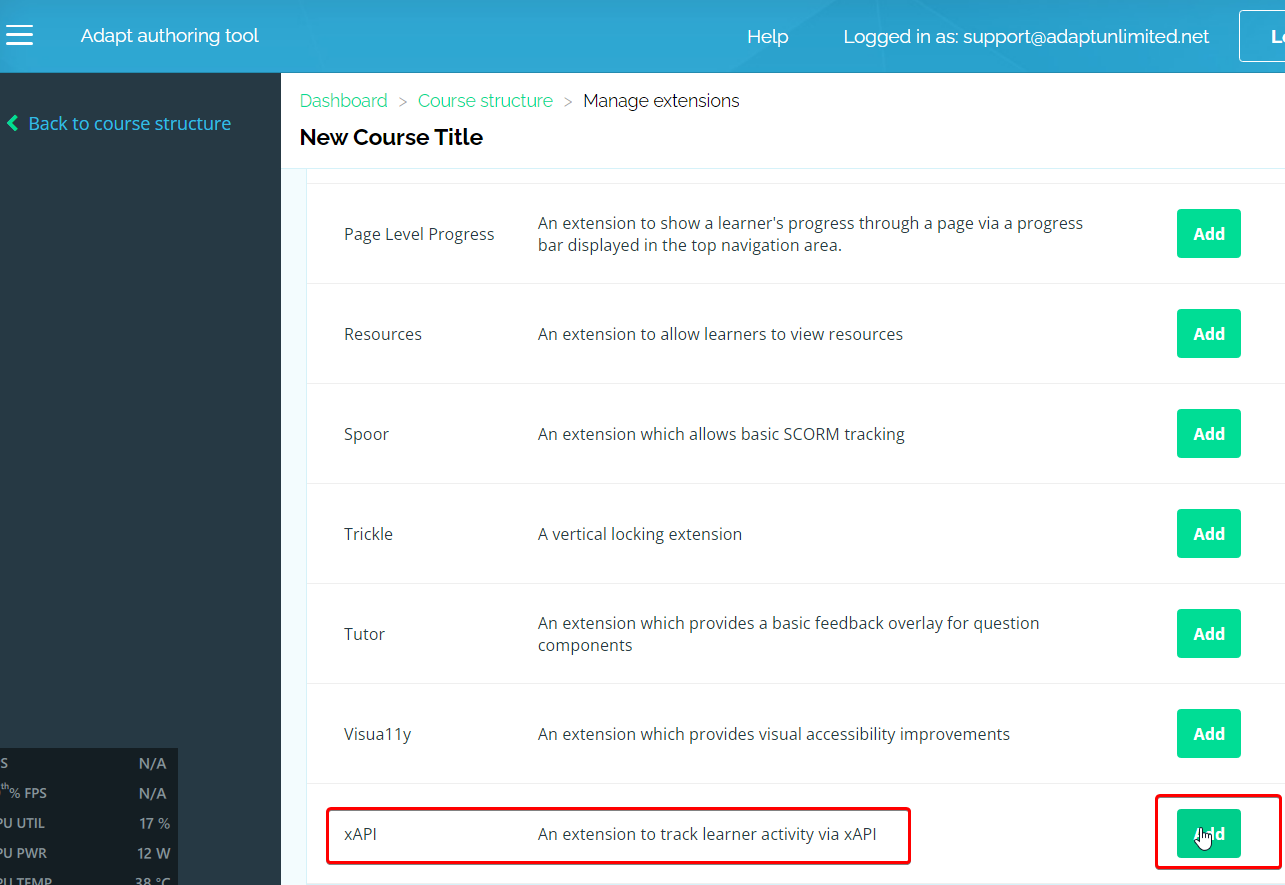
Go into Manage Extensions and then Add the xAPI extension to your course. You should also remove the Spoor extension if it is in your course as this result in SCORM being used instead.
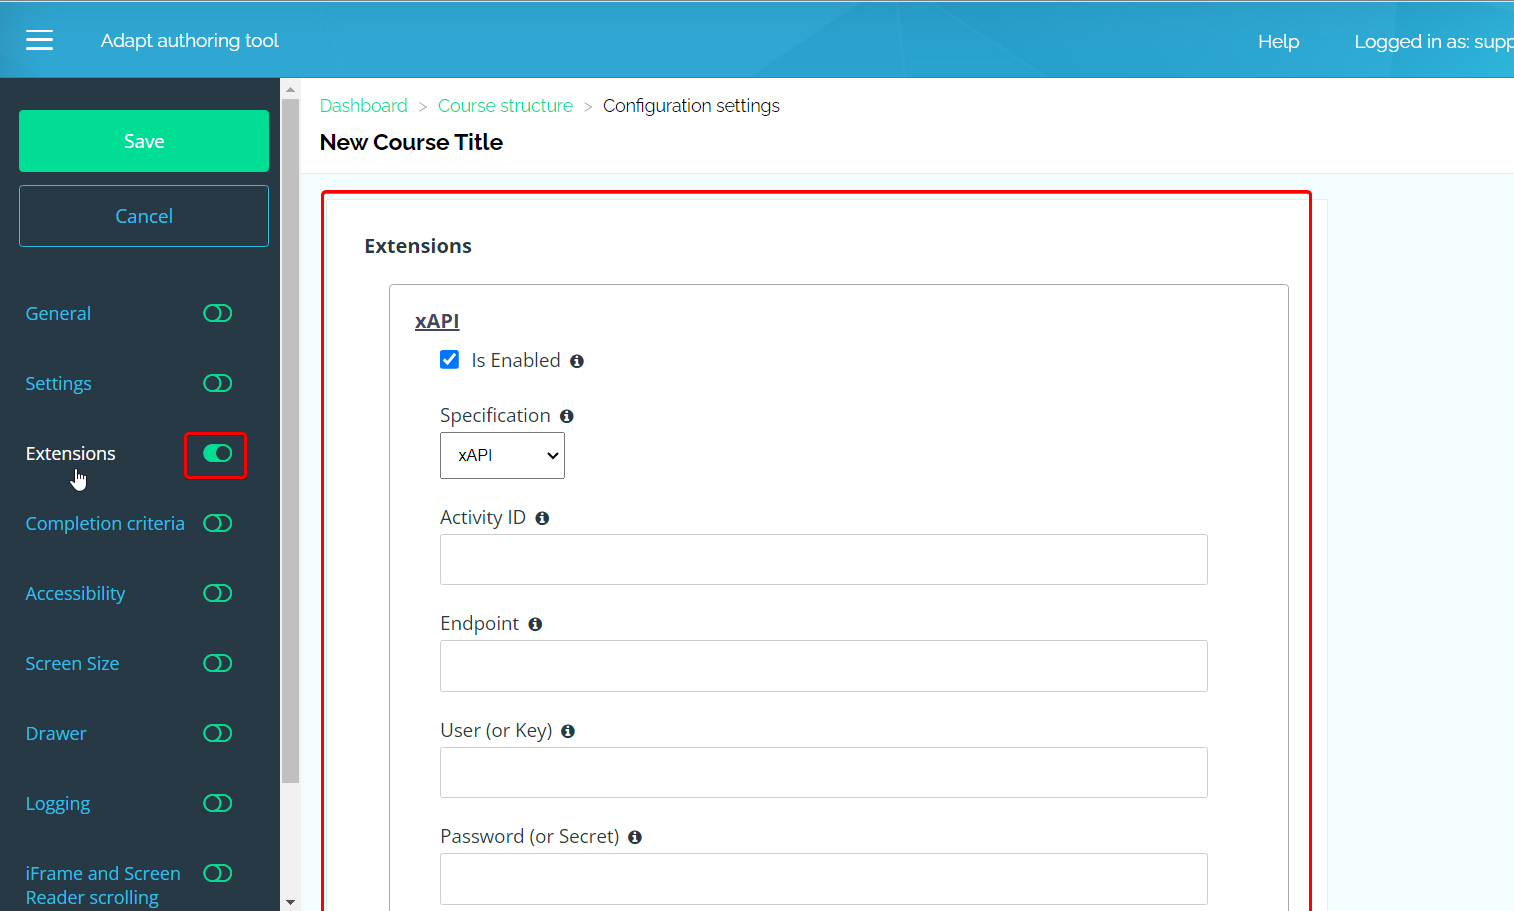
Go Back to course structure and click on Configuration Settings.
You can quickly jump to the Extensions section by using the filter on the left hand side. From here you should see the xAPI extension.
We are going to be jumping back and forth between SCORM Cloud and Adapt to put in all the variables.
Firstly you'll need to set the Endpoint, this is the web address that you are sending and receiving from.
In SCORM Cloud, click on the LRS Endpoints tab and you'll see a list of the different Endpoints available to you through SCORM Cloud. Functionality, they are all the same, so just use the top one.
Return to the Authoring Tool and paste this value into the Endpoint field.
Return to SCORM Cloud and click on the Activity Providers tab and then press Add Activity Provider.
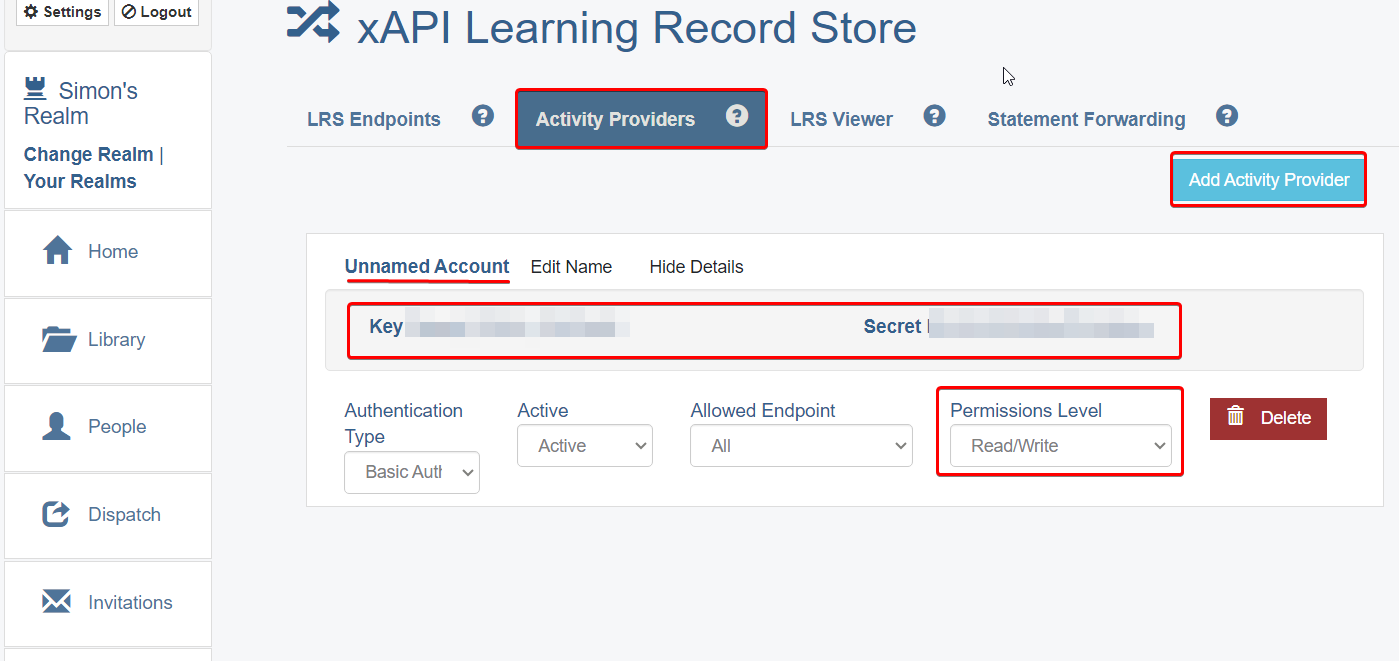
A new 'Unnamed account' will appear. You'll see a Key and Secret You'll also see a Permissions level dropdown which will be blank by default, ensure you set it to Read/Write.
Return to the Authoring Tool and paste these two values into User (or Key) and Password (or Secret) respectively.
Finally, we'll need to assign the Activity ID, the Adapt tooltip recommends using URL that the course is located at, however since we have not uploaded the course we do not know this yet. Fortunately you can also use a randomly made up URL, as long as the domain name matches the location where the course will be. Since we will be uploading our course to SCORM Cloud, you can use my example - https://cloud.scorm.com/test-123
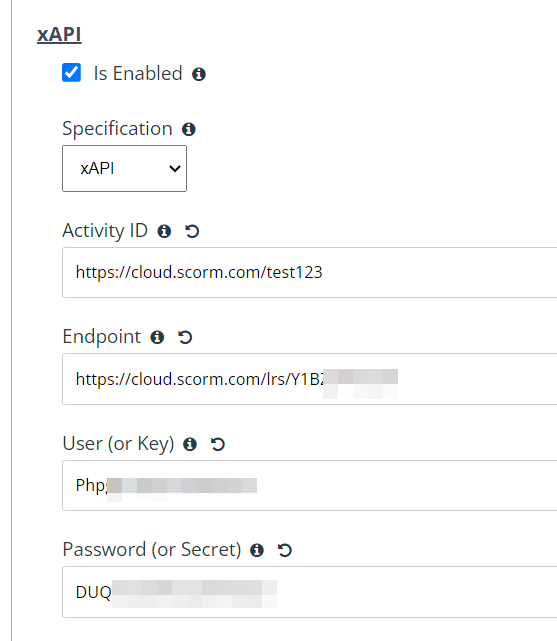
Confirm that these four values are filled in, your Endpoint, User and Password will be different to the blurred values I have here. Then Press Save and then Publish Course to download the course .ZIP file to your computer.
Step 4 - Uploading your course to SCORM Cloud
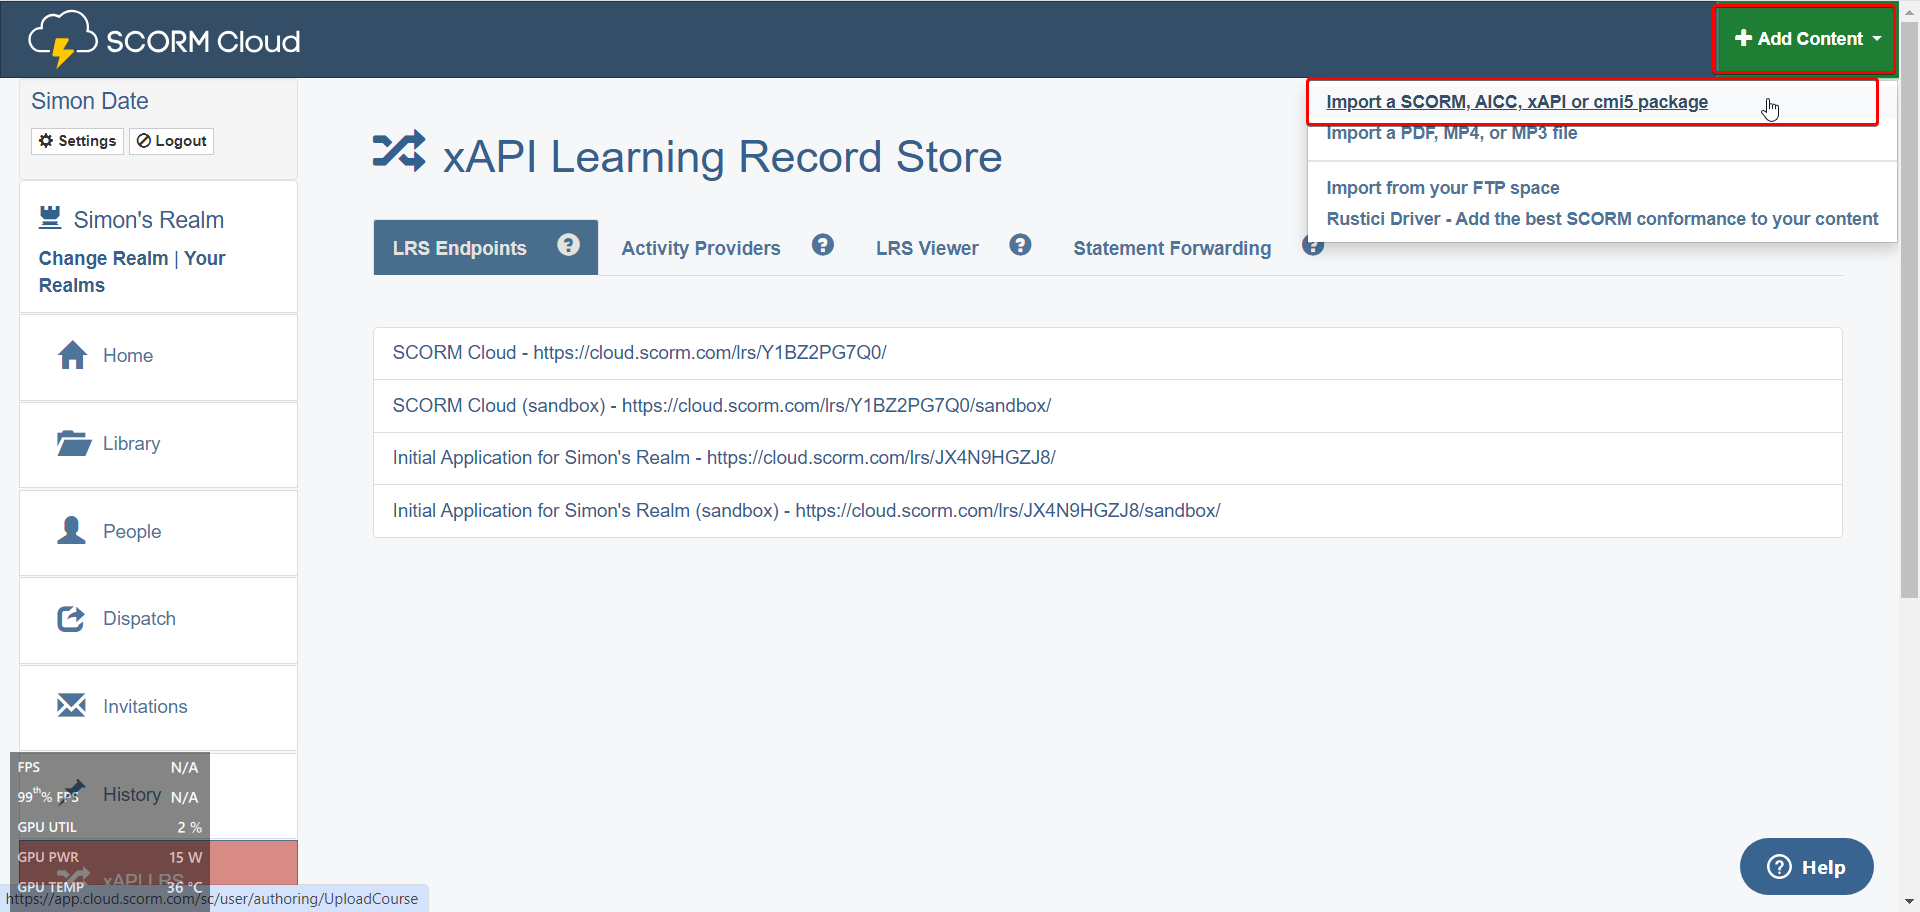
Now we're ready to publish our demo course to SCORM Cloud. From any screen you can press the Add Content button and then Import a SCORM, AICC, xAPI or cmi5 package.
Now find the .ZIP file from your computer and then click Import Course. This may take a few moments, depending on how large the course is.

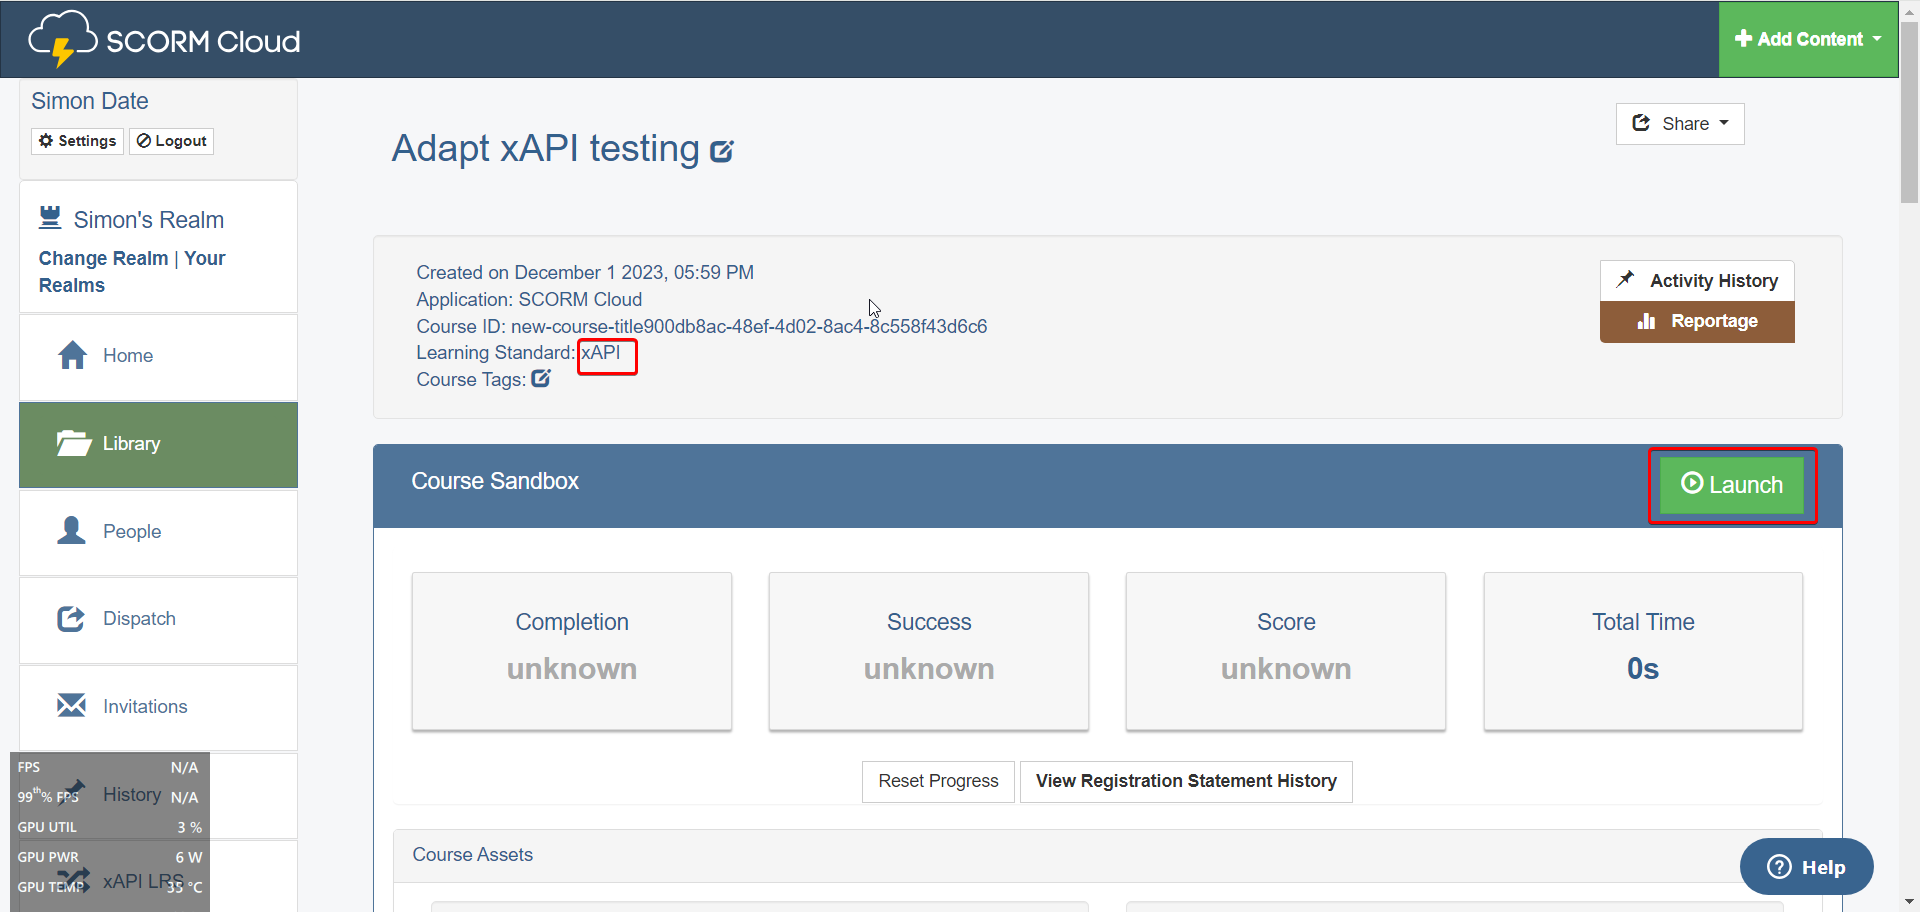
If you were successful you will be shown a course preview page. You should also be able to confirm that the learning standard is set to xAPI. When ready, press Launch to see the course.
Once you're in the course, by default Adapt shows an error message if xAPI was not configured properly. You may have missed a step, so go back and try again!
Once you've completed your course (or atleast completed a few components) close the window and Press 'Return to LMS'.
If you scroll down the page and get to the xAPI statements section it will show all the statements you generated.
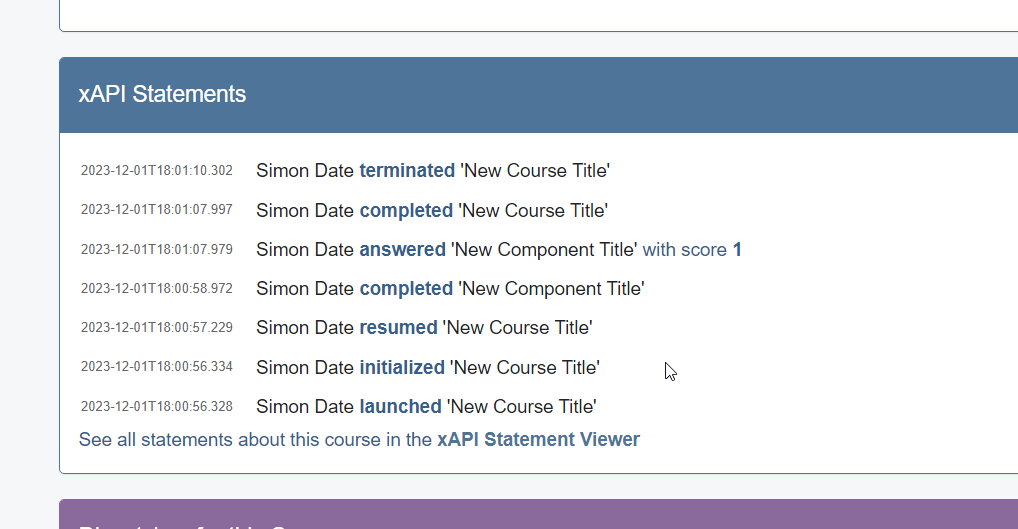
You can click on the xAPI Statement Viewer or return to the xAPI LRS and click the LRS Viewer tab to see the statements created for this course in more detail.
Congratulations! You've just sent your very first xAPI statements.