 Simon Date
On This Page
This guide will introduce you to Linux containers, and how you can use them for faster, lighter development with Adapt.
LXD and LXC
LXD, pronounced "LEX-D" (or however you prefer), is a system for creating and managing Linux containers (LXCs) and virtual machines (VMs). Full VMs are commonly used for development purposes, but they're not always the best solution for isolating and running one or two programs, owing to their requirement of significant portions of a host machine's resources.
For example, the Adapt authoring tool, framework and CLI could easily be installed on a Debian or Ubuntu VM complete with a desktop environment and all the trimmings. But this desktop environment doesn't come without a cost, particularly in terms of available RAM. You could notice applications on your host machine start to lag.
Virtual machines emulate a physical machine, using the hardware of the host system from a full and completely isolated operating system. System containers, on the other hand, use the OS kernel of the host system instead of creating their own environment. If you run several system containers, they all share the same kernel, which makes them faster and more light-weight than virtual machines.
With LXD, you can create both system containers and virtual machines. You should use a system container to leverage the smaller size and increased performance if all [the] functionality you require is compatible with the kernel of your host operating system. [1]
Getting started
Before moving on, ensure you have a GNU/Linux host machine (laptop or desktop PC, or a VM which supports nested virtualisation). I'd recommend using either Debian or Ubuntu as your distribution. In this guide I'll be using Debian 11 (bullseye), which at the time of writing is Debian's stable release.
Let's start by updating our APT package repositories and installing any available upgrades (omit the -y flag if you want to check what you're about to install before confirming):
sudo apt update && sudo apt -y upgrade
Next, we'll need to install Snap. The simplest way to install and manage LXD is with the Snap package, meaning snapd (the Snap daemon) needs to be installed and running before we can fetch and install LXD for our containers.
sudo apt install snapd
Now we can install LXD with Snap:
sudo snap install lxd
Before we can actually run LXD commands, and run them without the need for root privileges with sudo, we'll need to add Snap to our path and add our user to the lxd group:
echo 'export PATH="$PATH:/snap/bin"' >> ~/.bashrc
source ~/.bashrc
sudo adduser sam lxd
newgrp lxd
LXD init
We should now be ready to initialise LXD. After running the following command, we'll be asked some questions. Use the answers shown in the screenshot below. As long as you manually specify dir for the storage backend, you can accept the default for all other questions by simply hitting Enter for each. You'll notice I've gone with none for IPv6. This isn't strictly necessary but is a way to avoid potential networking issues, such as when downloading packages in the container.
lxd init

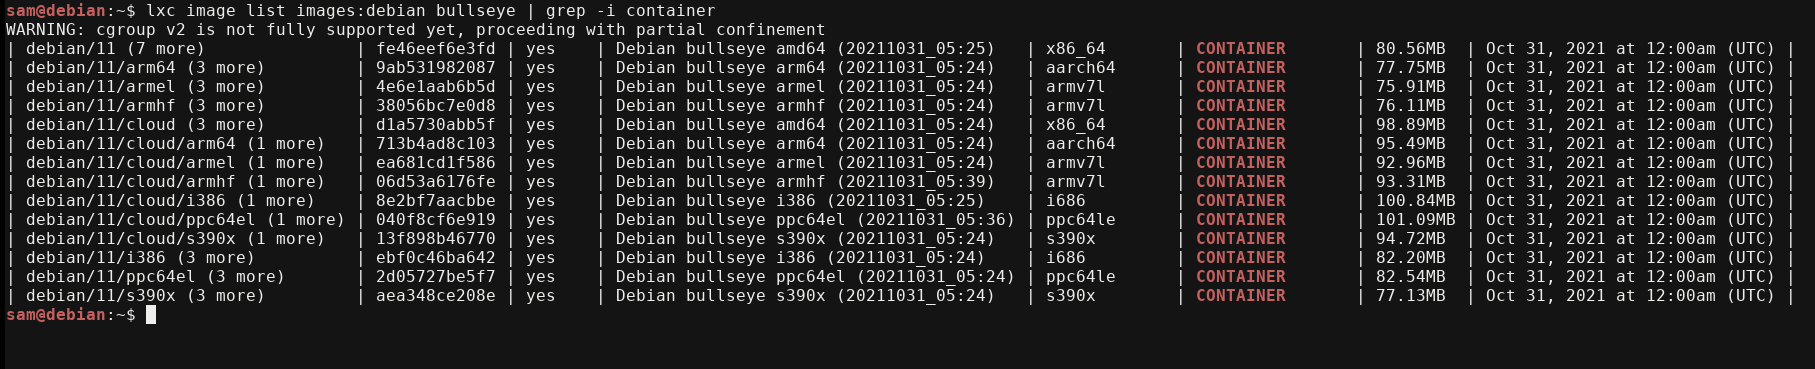
Now let's download and install our first container. For the purpose of this guide, we're going to install a Debian 11 (bullseye) container (ensuring the container and host machine are sharing the same kernel). Let's see what our options are:
lxc image list images:debian bullseye | grep -i container
Install the first container (replacing adaptv5 with your preferred name):
lxc launch images:debian/11 adaptv5
UFW allow
If our host has a firewall, we'll need to allow our lxdbr0 bridge interface to route packets from the container. If no firewall is active, the following two commands can be ignored. For UFW with a default policy set to deny incoming packets:
sudo ufw allow in on lxdbr0
sudo ufw route allow in on lxdbr0
Verify our new container is available and has an IPv4 address (you may need to repeat this command once or twice before you see an address):
lxc list

Access the container
At this point, our container is ready to use. We can run the following command to access it:
lxc exec adaptv5 bash
We've now been dropped into our new container as the user root. This means we're ready to put together our new Adapt development environment.
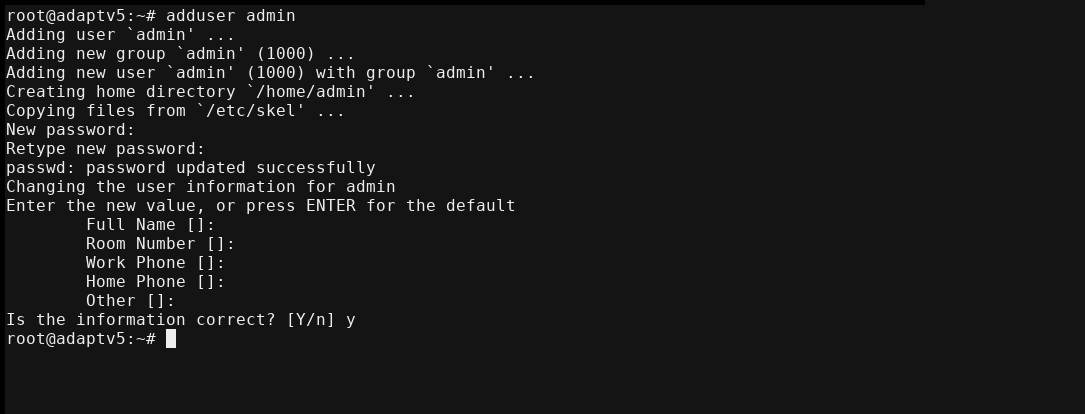
Start by creating a new user, which will be used going forward. After providing its password, we'll be asked for some more details. These can be skipped by hitting Enter for each. Finally, confirm with y.
After adding the user, we're going to add it to the sudo group. This will be needed for APT package upgrades and managing systemd services such as mongod.
adduser admin
adduser admin sudo
If you've made it this far without any issues, you're ready to continue installing and configuring the Adapt authoring tool and any additional packages. Refer to the Adapt authoring tool wiki and Adapt framework wiki for the recommended steps.